Showing posts with label Creative. Show all posts

Monday, 9 February 2015

February Half Term Challenge 2015 is here!


This years Theme: 3D Art Evolution

From the 17th, 18th and 19th February from 10am until 3.30pm at Sheffield Hallam Univeristy.


Friday, 26 September 2014

Wakey Makey Makey, GalleryCamp14 Derby QUAD


I've come across this funky little circuit board before but this was my first hands on and it was quite a delightful experience  my dear!

I was attending the Makey Makey workshop at the GalleryCamp14 Unconference at QUAD this year. 
Your connect it via USB to your computer then use wires ending in croc clips to connect the board to any electrically conductive object, and away you go. 

And I do mean ANY electrically conductive object.

 From bananas to pencil graphite to squidgy sweets and play dough, it all works fella.  "You can even hook up a row of students and bang their bonces like a drum machine"

Dialup the makeymakey website and then got to the 'how to' section. You can control games and music making software and basically anything that requires a controller. 

The computer sees the board as a control input interface and  this is why the magic happens - when you add software like Scratch you not only create your own game, you create how its controlled.

If you already know scratch you'll soon be up and running, jumping, shooting and banging in no time, just check out the tutorials abound on the Makey Makey website.


£40 from Maplin. Bargain. Go play.


Sunday, 19 May 2013

Movie Making Resources

Free Movie Making Resources!


It can be the hardest thing to come up with an idea for a movie script! By selecting colourful blocks in each section, the StoryMaker Flow Chart will help you assemble the key points in your films' plot to create your own story!


Once you have your idea the next stage is to plan your movie. This Brainstorm template helps you to plan and begin writing your script!


Okay so you've got a great idea and want to write a script. This Storyboard Template will help you to see what your movie will look like, scene by scene and shot by shot.


Video Logging Sheet


After you have shot your film its important to log your video footage. This easy to use template will help you choose your good shots and leave out the not so great ones!

Friday, 17 May 2013

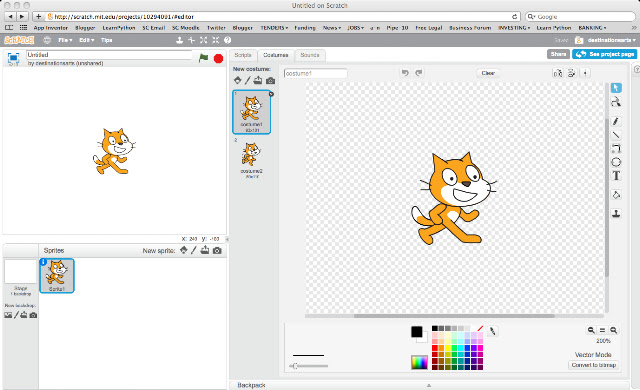
Scratch 2.0 Has arrived!

Its here... Scratch 2.0


Building on the success of 1.4 This version offers so much more.

We've been testing it out during the after school club at the University and its pretty good!

New programming interface and program software is now web-based


Its now web-based and offers a multitude of new programming functions and you still need an account.  

Now its web-based it comes with some obvious benefits - you don't need to download software and then install, you just surf and go!

The clever bods at MIT might also develop a stand alone player so watch this space!


The Random Excuse Generator App

The Create Project 2013 Presents the .....

The App we have all been waiting for!! Created using MIT App Inventor - a great tool for rapid prototyping!

In April during workshops at Sheffield Hallam University, Jenson Grant worked with a group of Y11 secondary school students to build the worlds most useful Mobile Phone App!

Design View of our App in MIT App Inventor
During our design process we developed a design brief and thought about the user mechanics of the App. 


Why the user would want the App and what the user was going to get out of the experience.
Blocks view shows you all the programming logic . You need the latest version of JAVA on your computer to run this! 
During the design and building process we; 

- thought about what we needed in our lives - what would make us excited!

- sketched some designs and opened MIT App Inventor accounts. 

- designed an interface

- built the programming block

- tested and packaged the APP!

Our completed prototype ready for soft testing and distribution to our mobile device!
MIT App Inventor is a quick and easy to learn tool for rapid prototyping and we would need to make lots of changes to our app if we ever wanted to bring it to Market but as a quick and easy introduction - it was faultless!

The create project is an initiative supported by Maxine Greaves at Sheffield Hallam University, to encourage young people to creatively engage in digital technologies. 

Thursday, 21 March 2013

Archie Markham Project - 19th March 2013

 Creating An App was a tricky business....

Storyboard plan for App
Today we began outlining what sort of interactive application we wanted to create.  


Participants created storyboards illustrating the user experience.


We had a big discussion about different types of interactive media and what media was.

Friday, 15 March 2013

Archie Markham project - 12th March 2013


At the Hallam University workshops, we have just completed our body of poems'! 

Participants used Haiku poetry form with life sized outlines of their bodies.  They decorated the cutouts with poems and words and drawings 

Watch the video!

Monday, 25 February 2013

Archie Markham Project Febuary Half Term 2013


Participants capturing images of their local environment to inspire Poetry and new work


Over 3 days participants worked with Artists and volunteers to create Art and Apps based on the work of Archie Markham!

A the end of the project, students put on a show for parents!


Friday, 15 February 2013

Archie Markham Project - 12th Feb 2013


At the Hallam University workshops, participants talk about their work in todays session.

Watch the video!

Friday, 8 February 2013

Friday, 2 November 2012

Fantastic Creatures - October Half Term Challenge

MinaLep
The October Half term challenge created monsters!

During October halft-term 20 students from across the city used digital tools to create fantastical amalgamations of their favourite animals. Spurred on by ideas presented in nonsense poetry - i.e., portmanteau words (Snake + Shark = Snark!) students transformed the real into the mythical.

With the support of the Open University and SHEBEEN, students also had a go at being nature detectives with the OPAL project. They used digital cameras to record the insects they found then uploaded their pictures to the iSpot website for identification! 

Hosted by the PIE/ArtsLab initiative, a partnership between Sheffield Hallam University's Equality and Community Engagement manager Maxine Greaves and Destinations Arts, this project was about using fun and creative ways to promote literacy, Maths and Science learning using digital technologies.
RinoWolf

Tuesday, 17 July 2012

Archie Markham Project Launch


A media Arts and performance project celebrating the writing and life of E.A. Markham!

Fours creative's -  an Actor, a Writer, a digital Artist and a Dance Artist will work with pupils from Huckolow schoool to produce a spectacualr performance for Black HIstory Month 2012!

Themed 'many voice' our first session involved pretending to be someone else. With our help, students worked out  a scenario where they pretended to be old by dressing up, speaking in an old way and moving in a  old way - it was fantastic!

Afterwards students evaluated their experience and told us how they wanted to project to do in the future.

Archie Markham was professor emeritus at Sheffield Hallam Unvieristy, he died in 2008.


Friday, 20 January 2012

Creating a 3D image using GIMP

3D Thandie with toy Megaphone
You will need a pair of anaglyph glasses - the one's with the red lens for the left eye and a cyan lens for the right eye.


I will talk you through how to turn a digital image into a 3D one! GIMP is an easy to use  powerful free image editing software. You can use Photoshop or any app that lets you edit and recolour you image using layers.


To complete this tutorial, you need to have the latest version of GIMP installed and image to work with (images where the foreground contrasts with the background work best) and a pair of 3D specs.


1. Open up you image in GIMP. 


Note:  Make sure you can see the layers menu, if not go to MENU-WINDOWS-DOCKABLE DIALOGS-LAYERS  move it to the right hand side of the screen for easy access.


2. Duplicate your image so you have two layers  - click on the 'duplicate icon, two small squares overlapping, at the bottom of layers panel next to the green up/down arrows.


3. Select each layer then COLORS - DESATURATE. Make sure you have the 'eye' icon selected to see each layer.


4. Select the top image layer and turn off the bottom image layer eye icon.


5. COLORS - COLOR BALANCE move the top slider towards cyan so it reads -100, we want to make the blue a bit richer so move the middle slider towards Magenta -50.


6. Turn of the blued top layer eye icon and turn on the bottom layer eye icon. The image should still be black and white if not repeat step 3


7. COLORS - COLOR BALANCE move the middle slider towards magenta so it reads -100, again we want to make the colour a bit richer so move the bottom slider towards Yellow so the number reads  -59.


Now here comes the exciting bit!


8. Turn both eye icons on, select the 'move' tool (it looks like a blue cross) from the TOOLBOX palette it should be open, if not go to MENU-WINDOWS-DOCKABLE DIALOGS-TOOLS

9. Select and move your top blue layer to the left slightly - 3 or 5 millimetres - we are trying to recreate the space between your right and left eyes!

10. Put your 3D specs on.

11. Make sure both layer 'eye' icons are showing then move the opacity slider of the BLUE top layer, in the LAYERS menu to about 48.3


12. With your glasses on you should be able to start seeing the 3D effect. You might have to revisit steps 5 and 7 and reapply with cyan and magenta sliders so the colours are richer and brighter. You might have to slightly adjust the top blue image back or forth to get the desired effect! Enlarge your image VIEW-ZOOM- 200% it will look great!


13. Save your work


14. Your image will probaly look best on a monitor or as a high quality colour print.  


You can purchase 3D glasses from Amazon or make your own out of card or recycle some old specs!


Enjoy!

Monday, 8 August 2011

Barnsley Young Apprentice Summer School

Students Rehearsing
Students from Barnsley have completed a Performing Arts and Media Summer School at Sheffield Hallam University.


Key Stage 5 students created showreels and a pop video during professional media training workshops.


The Summer school was all about getting a real world taste of what its like to work in the cultural industries. 


Students; grew in confidence; led their own learning and development; received professional training and improved their readiness for the job market. This was a Barnsley Young Apprenticeship Programme. Maxine Greaves, Equality and Community Engagement Manager at Sheffield Hallam University, hosted the Summer School.

Friday, 20 May 2011

An Easy Stop Motion Animation Project

Equipment Needed: Digital Camera, Small Tripod, Table, Set or Backdrop, Characters, Editing Software


1. Before you start, press the menu button on your camera and set your picture quality to 2 mega pixels


2. Place you camera on a tripod in front of your Set or backdrop (make sure the maximum amount of light is falling onto your Set.


3. Decide what the physical movements you want for your characters and take a picture. 
IMPORTANT: Keep your camera and tripod still during picture taking. Get someone to hold the base legs of the tripod.


4. Take 50 pictures for 25 seconds of action


5. Open your software and copy your pictures to your computers hard drive.


6. Open your editing software and import your pictures


7. Ensure that you set your still image options to 0.5 seconds (In Windows moviemaker XP  'Options', 'Advanced' 'Picture Duration  In iMovie 09 - 'Project properties', 'Timing' 'Photo Duration'.


8. Place your pictures in numerical order on the timeline


9. Play your animation on the timeline


10. Checkout the 'Adding a Narration' post to add a dialogue soundtrack to your animation.

Friday, 4 February 2011

Creative ICT in Early Years, Leeds

Magical-Den-Car-House
It's not all about the 'tweens', using new technologies creatively with toddlers develops the thinking and language skills of little ones.


This month, I completed a creative ICT residency in two Early Years settings in Leeds. 


Toy loudspeaker phone
The project drew heavily on the Reggio Emilia approach of imaginative child led open-ended play that leads to deeper learning for young minds.


Using toy loudspeakers, FLIP video cameras, easi-speak mics, cardboard, fabric scraps and tiny LED lights, we transformed indoor and outdoor spaces into magical places.


This exciting opportunity to use ICT in an unpredictable and experimental way was supported by ARTFORMS Leeds.